Task 1:使用不同的加密算法和加密模式加密
1. AES-128-CBC 模式加密
-
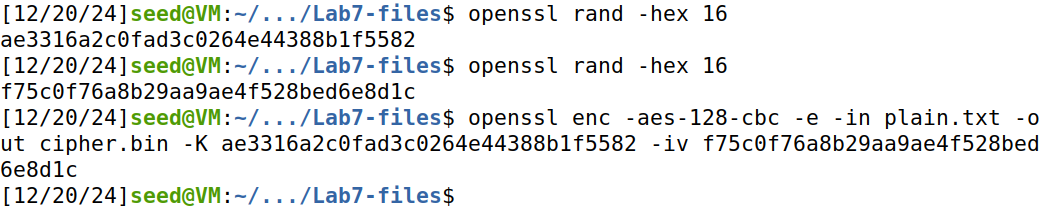
使用 OpenSSL 随机生成 128bit 的 Key 和 IV
$ openssl rand -hex 16 -
使用OpenSSL对明文进行加密
2. AES-128-CFB 模式加密

3. Blowfish-CBC 模式加密

Task 2:加密模式:ECB vs. CBC
1. 首先分别使用 AES-128-CBC 和 AES-128-ECB 模式加密图片
- 使用 AES-128-CBC 加密得到 p1.bmp

- 使用 AES-128-ECB 加密得到 p2.bmp

2. 使用图片的图片头进行拼接

3. 查看加密后的图片
左为CBC模式,中间为原始图像,右为ECB模式。
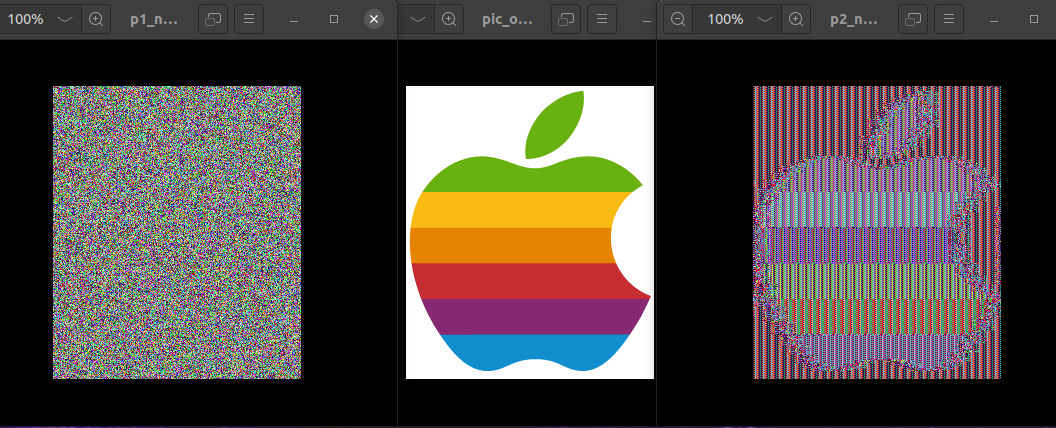
现象:我们可以发现,使用CBC模式加密的图片已经失去了所有图像特征,但使用ECB模式加密的图片还可以显示出原有的 Apple Logo 的轮廓信息。
解释:这与CBC和ECB模式的加密方式有关,CBC模式每一个数据块在加密时都依赖于前一个块的密文,因此即使原始数据相同,加密出的密文也会有所不同,因此不会泄露图像的轮廓特征,而ECB加密模式中,每一个数据块都是独立加密的,相同的原始数据加密后得到的密文也相同,因此对于图片这种重复模式较强的文件,相同的部分加密后会产生相同的加密块,从而泄露图片的结构信息。
4. 对 sample.bmp 进行加密
左为CBC模式,中间为原始图像,右为ECB模式。
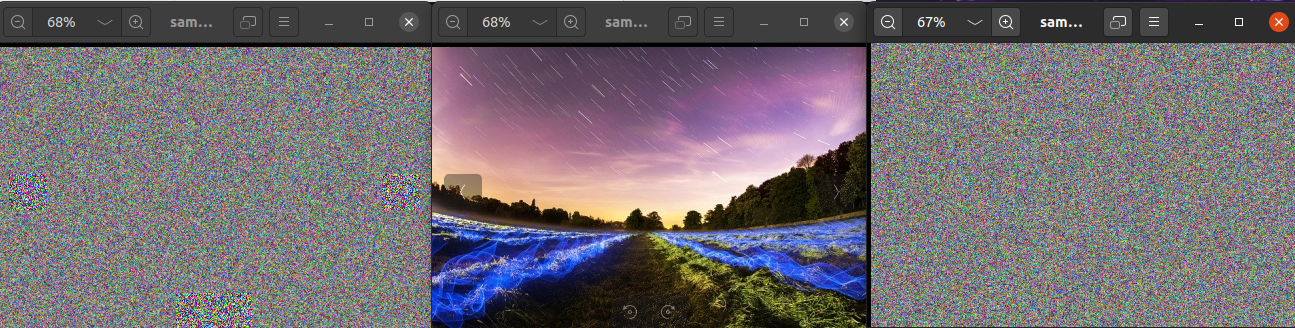
这张图片使用CBC和ECB加密后都没有明显的特征了,原因是这张图片没有大面积的重复的色块,即使使用ECB模式加密也不会泄露图片的结构信息。
Task 3:错误传播 – 被破坏的密文
答:
能从 CBC 中恢复 $总字节数-17字节$ 的信息,能从ECB中恢复 $总字节数-16字节$ 的信息。
1. 创建一个至少 1000 字节长的文本文件。
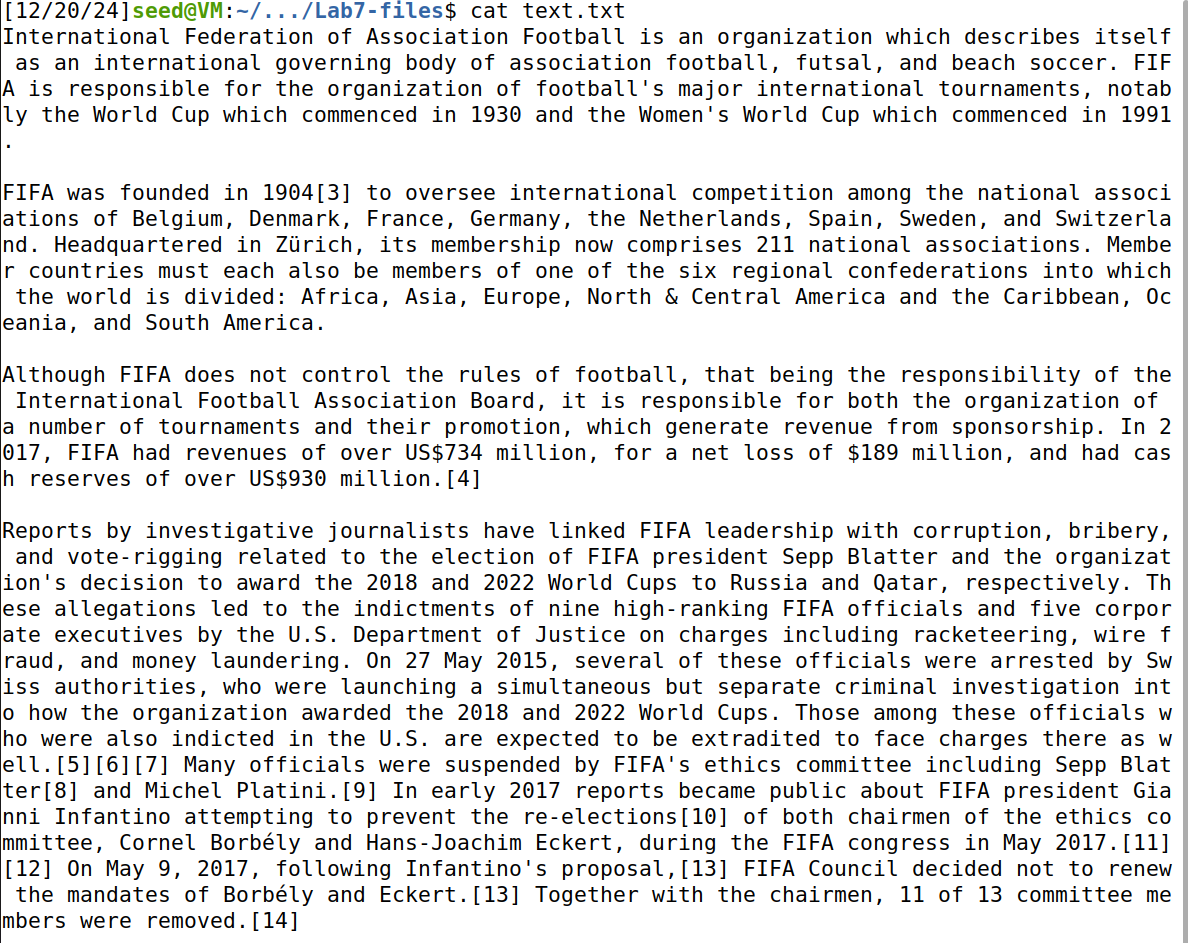
2. 分别使用AES-128-CBC和AES-128-ECB加密

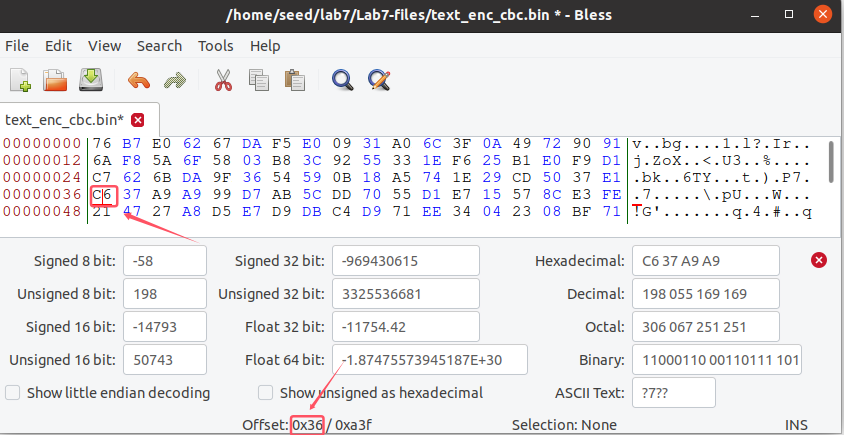
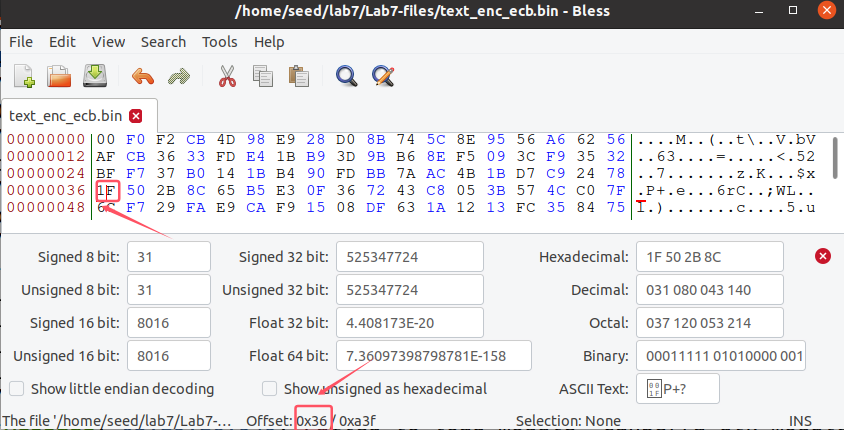
3. 分别修改加密后文件的第55个字节

使用bless修改偏移为0x36位置(偏移从0开始)的字节,分别修改一个比特。
4. 使用正确的Key和IV进行解密

5. 与原文件进行对比
使用 cmp 命令逐位比较原文件和解密文件的不同的字节数,并使用 wc -l 统计不同的总字节数。

**现象:**发现 cbc 模式下,密文 1 bit 的错误会导致解密出的明文 17 字节的错误,而 ecb 模式下,密文 1 bit 的错误会导致解密出的明文 16 字节的错误。
原因:
- ECB模式下每个 16 字节的块单独加密,因此该错误比特只会影响自己所在的块的解密,因此会导致解密明文的 16 字节的错误
- CBC模式下,每一个块的解密依赖于前一个块的密文,会导致当前的块的 16 个字节解密错误,同时因为密文块有 1 bit的错误,会影响下一个块的首字节的解密,导致下一个块的首字节解密错误,因此一共产生 17 个字节的错误。
Task 4:寻找密钥
使用以下代码可以找到密钥:
from Crypto.Cipher import AES
import binascii

plaintext = b"This is a top secret."
ciphertext_hex = (
    "e29652fd35eb14b222f9a90d97902d2d"
    "eef000978fa0952d7a98bbe0e251286b"
)
iv_hex = "010203040506070809000a0b0c0d0e0f"

# 转换为字节
ciphertext = binascii.unhexlify(ciphertext_hex)
iv = binascii.unhexlify(iv_hex)

# 构造密钥并解密
def decrypt_with_key(word):
    # 不足16字节补`#`
    key = word.ljust(16, "#").encode("utf-8")
    # 初始化AES解密器
    cipher = AES.new(key, AES.MODE_CBC, iv)
    decrypted = cipher.decrypt(ciphertext)
    # 检查解密是否成功
    if decrypted.strip() == plaintext:
        return True, word
    return False, None

# 从文件加载单词列表
with open("words.txt", "r") as f:
    words = f.read().splitlines()

# 逐一尝试密钥
for word in words:
    if len(word)<=16:
        success, key = decrypt_with_key(word)
        if success:
            print(f"找到正确的密钥:{key}")
            break
else:
    print("未找到正确的密钥。")

通过对 word.txt 字典文件的遍历,找到了正确的密钥为:snowstorm
Task 5:生成消息摘要
使用 sha1, sha256, md5, sm3 等算法生成消息摘要,如下所示:
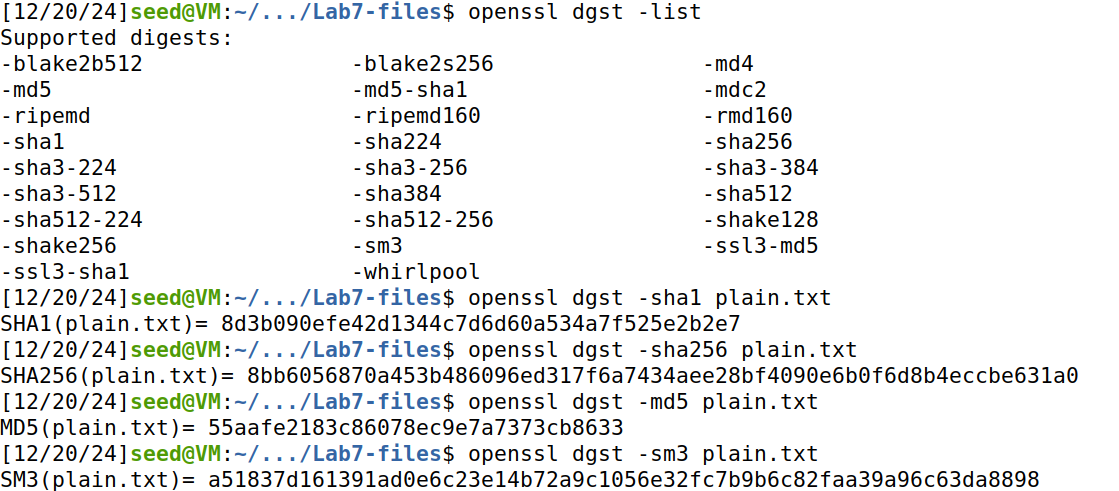
现象:不同算法生成的消息摘要的长度不同,见下表:
| 算法 | 消息摘要长度 |
|---|---|
| SHA-1 | 160 位(20 字节) |
| SHA-256 | 256 位(32 字节) |
| MD5 | 128 位(16 字节) |
| SM3 | 256 位(32 字节) |
Task 6:哈希函数的输出特性
1. 使用 SHA-1 算法生成哈希值 H1

2. 修改 plain.txt 的一个比特,再使用 SHA-1 算法生成哈希值 H2
- 使用 bless 修改 plain.txt 的第一位,将 49 改为 59
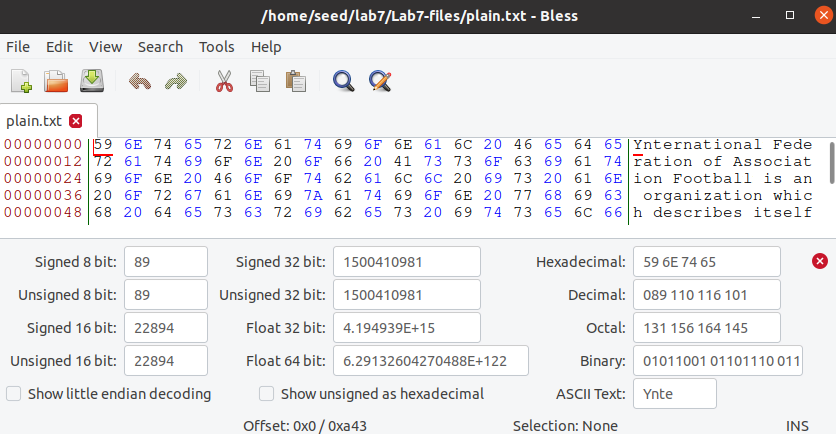
- 使用 SHA-1 算法生成哈希值 H2

3. 对比 H1 和 H2
发现 H1 和 H2 并不相似,这说明即使文件只有 1 bit 不同,生成的消息摘要值就完全不同。
Task 7:单向性与抗碰撞性
编写一个 C 程序,通过生成随机字符串寻找与origin.txt前 24 比特相同的文件:
#include <stdio.h>
#include <stdlib.h>
#include <string.h>
#include <openssl/sha.h>
#include <time.h>

// 计算文件的 SHA1 哈希值,并返回前 24 位
void compute_sha1_prefix(const char *filename, unsigned char *sha1_prefix) {
    FILE *file = fopen(filename, "rb");
    if (file == NULL) {
        perror("File opening failed");
        exit(1);
    }

    // 计算文件的 SHA1 哈希
    SHA_CTX sha_ctx;
    SHA1_Init(&sha_ctx);

    unsigned char buffer[1024];
    size_t bytes_read;
    while ((bytes_read = fread(buffer, 1, sizeof(buffer), file)) > 0) {
        SHA1_Update(&sha_ctx, buffer, bytes_read);
    }

    fclose(file);

    unsigned char sha1_hash[SHA_DIGEST_LENGTH];
    SHA1_Final(sha1_hash, &sha_ctx);

    // 只取前 24 位,即前 3 字节
    memcpy(sha1_prefix, sha1_hash, 3);
}

// 计算字符串的 SHA1 哈希值
void compute_sha1_string(const char *str, unsigned char *sha1_hash) {
    SHA_CTX sha_ctx;
    SHA1_Init(&sha_ctx);
    SHA1_Update(&sha_ctx, str, strlen(str));
    SHA1_Final(sha1_hash, &sha_ctx);
}

// 将 SHA1 哈希值的前 24 位转换为十六进制字符串
void sha1_prefix_to_hex(const unsigned char *sha1_prefix, char *output) {
    for (int i = 0; i < 3; ++i) {
        sprintf(output + i * 2, "%02x", sha1_prefix[i]);
    }
    output[6] = '\0';  // 确保字符串以 '\0' 结束
}

// 将碰撞的随机字符串写入文件
void write_collision_to_file(const char *filename, const char *str) {
    FILE *file = fopen(filename, "wb");  // 使用 'wb' 模式,以二进制模式写入内容
    if (file == NULL) {
        perror("Failed to open file for writing");
        exit(1);
    }

    // 将随机字符串逐字节写入文件(不添加换行符或其他字符)
    fwrite(str, 1, strlen(str), file);

    fclose(file);
}

int main() {
    srand(time(NULL));  // 用时间作为随机数种子

    // Step 1: 计算 original.txt 文件的 SHA1 哈希值并获取前 24 位
    unsigned char original_sha1_prefix[3];
    compute_sha1_prefix("original.txt", original_sha1_prefix);

    // 将前 24 位 SHA1 哈希值转换为十六进制字符串
    char original_sha1_hex[7];
    sha1_prefix_to_hex(original_sha1_prefix, original_sha1_hex);

    printf("Original file SHA1 prefix (24 bits): %s\n", original_sha1_hex);

    // Step 2: 进行10次实验并记录尝试次数
    int total_attempts = 0;
    int num_experiments = 10;  // 实验次数
    char last_collision_string[100];  // 保存最后一次实验找到的随机字符串

    for (int exp = 0; exp < num_experiments; ++exp) {
        int attempts = 0;
        unsigned char test_sha1_hash[SHA_DIGEST_LENGTH];
        char test_string[100];
        unsigned char test_sha1_prefix[3];
        char test_sha1_hex[7];

        while (1) {
            // 生成一个随机字符串
            int len = rand() % 50 + 1;  // 随机生成字符串长度,1 到 50 字符
            for (int i = 0; i < len; ++i) {
                test_string[i] = 'a' + rand() % 26;  // 生成 'a' 到 'z' 的随机字符
            }
            test_string[len] = '\0';  // 结束符

            // 计算该字符串的 SHA1 哈希值
            compute_sha1_string(test_string, test_sha1_hash);

            // 提取前 24 位哈希值
            memcpy(test_sha1_prefix, test_sha1_hash, 3);

            // 转换为十六进制字符串进行比较
            sha1_prefix_to_hex(test_sha1_prefix, test_sha1_hex);

            // 比较前 24 位是否相同
            if (strncmp(original_sha1_hex, test_sha1_hex, 6) == 0) {
                // 找到碰撞,保存随机字符串
                strcpy(last_collision_string, test_string);
                break;  // 退出循环
            }

            attempts++;
        }

        total_attempts += attempts;
        printf("Experiment %d: Found collision after %d attempts\n", exp + 1, attempts);
    }

    // Step 3: 计算平均尝试次数
    float average_attempts = total_attempts / (float)num_experiments;
    printf("Average number of attempts: %.2f\n", average_attempts);

    // Step 4: 将最后一次实验找到的随机字符串写入文件
    write_collision_to_file("collision_result.txt", last_collision_string);
    printf("Last collision string written to collision_result.txt: %s\n", last_collision_string);

    return 0;
}
使用以下命令编译这个 C 源码:
gcc -o sha1_collision sha1_collision.c -lssl -lcrypto
进行 10 次实验,计算爆破所需的平均次数,并将最后一次的结果写入文件,如下所示:
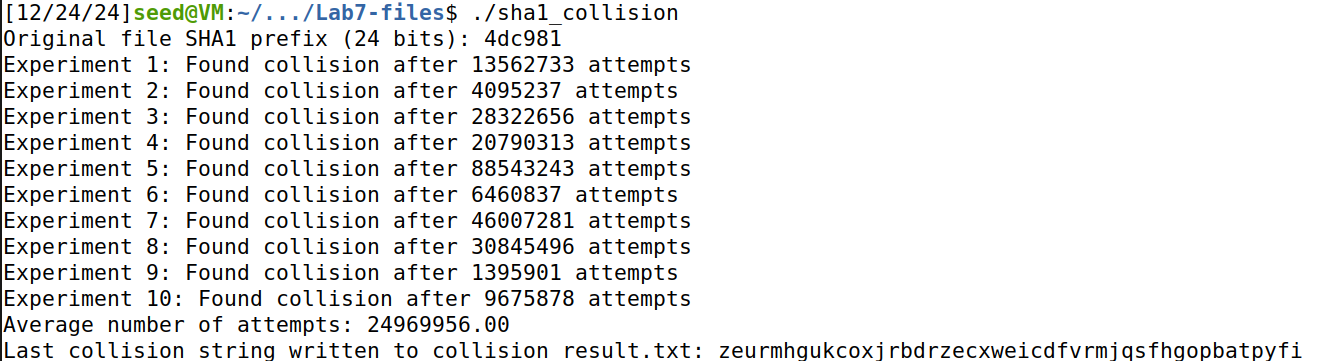
找到的文本如下:
zeurmhgukcoxjrbdrzecxweicdfvrmjqsfhgopbatpyfi
验证与 origin.txt 的 sha1 值的前 24 bit 是否一致:

发现确实是一致的。